Before you begin:
Make sure Navis N4 XPS is connected to the automated crane control system (ACCS). Otherwise, you will not be able to see ASCs in the yard view.
Prerequisites
XPS privilege EDTCHR
When you assign a CHE range to an ASC, this means that XPS dispatches transport orders with work into or out of this range to the assigned ASC. You can change the range that an ASC covers on the fly, but typically, you define it once and do not make any changes unless, for example, a crane breaks down or is taken out of service for maintenance.
You create a range for an ASC in the CHE range view mode in the yard satellite or block view only if the XPS privilege EDTCHR is turned on.
A range can include up to an entire block, but most often two cranes cover one block, with an overlapping area in the middle. The overlapping area is helpful when it comes to splitting work instructions (on page 1).
You can assign a CHE to more than one range. Typically, you also assign an ASC to the transfer zone adjacent to the block it serves.
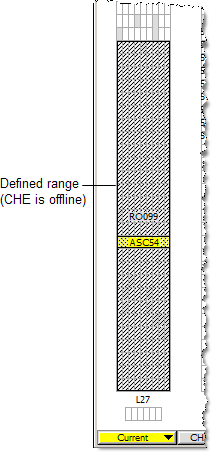
In the yard view, the color of the CHE range indicates whether the crane is online or offline:
Gray - offline
Blue - online
To define an ASC range:
In an XPS client, from the Yard menu, select Satellite View, and then select the view that includes the required yard area.
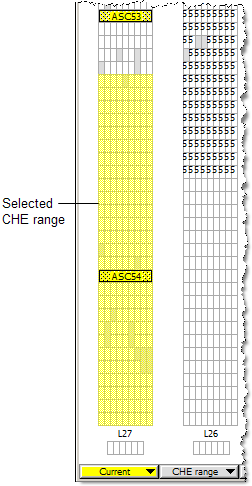
From the Display Mode menu, select CHE range.
In the satellite view, drag the pointer across the area that you want the crane to cover.
When you release the mouse button, the area you selected appears in yellow.
Do one of the following:
Click the selected area. This brings up a list of all available CHEs.
Shift-click the selected area. This brings up a list of all existing CHEs, regardless of whether they are available or not.
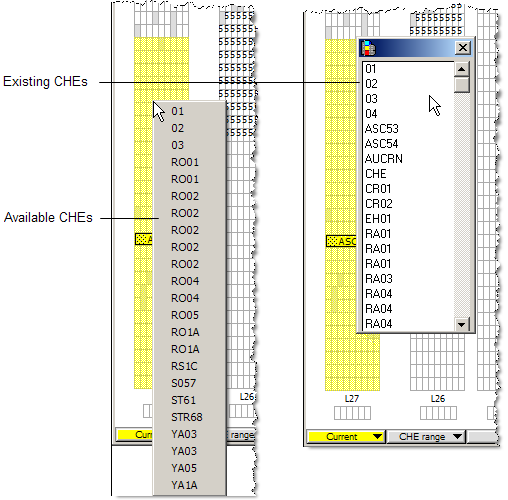
Click or double-click the CHE for which you want to define the range. The list closes and the defined range appears in the view.